Back to Knowledge Base


How to connect your domain with Hostbox servers?
First create a Cloudflare account for your domain, if you don't have one already, follow the link below:
Once you are in, start by adding your domain, and click "Continue".
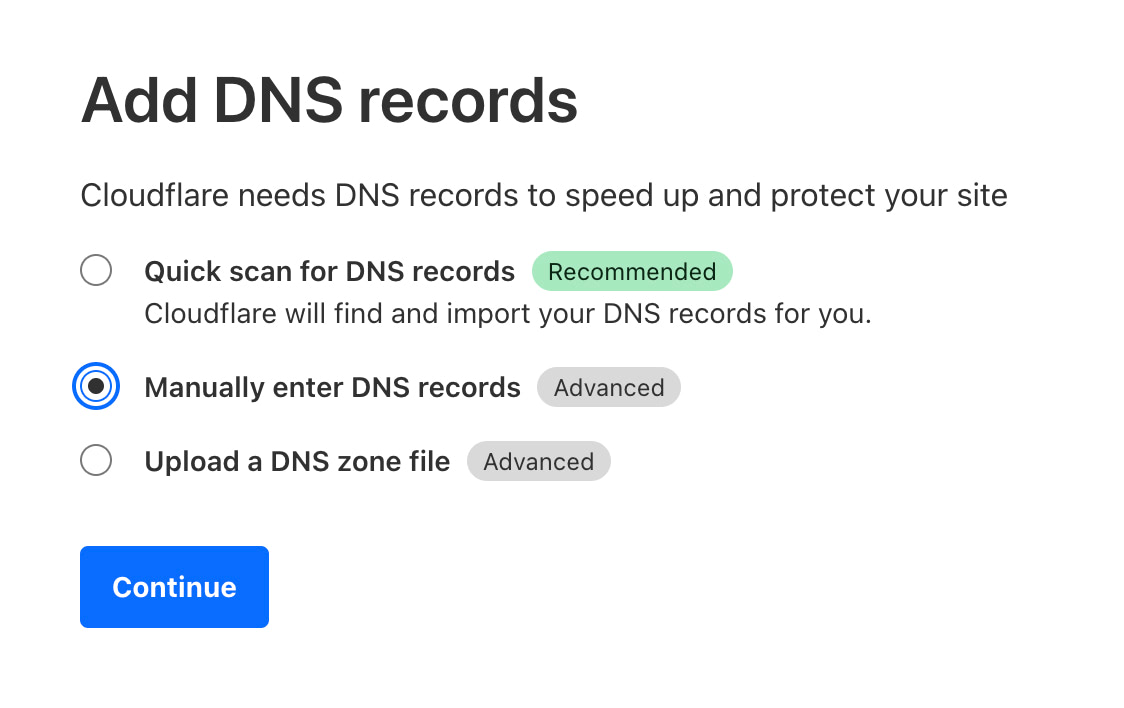
Cloudflare will ask for your DNS records, select "Manually enter DNS records".
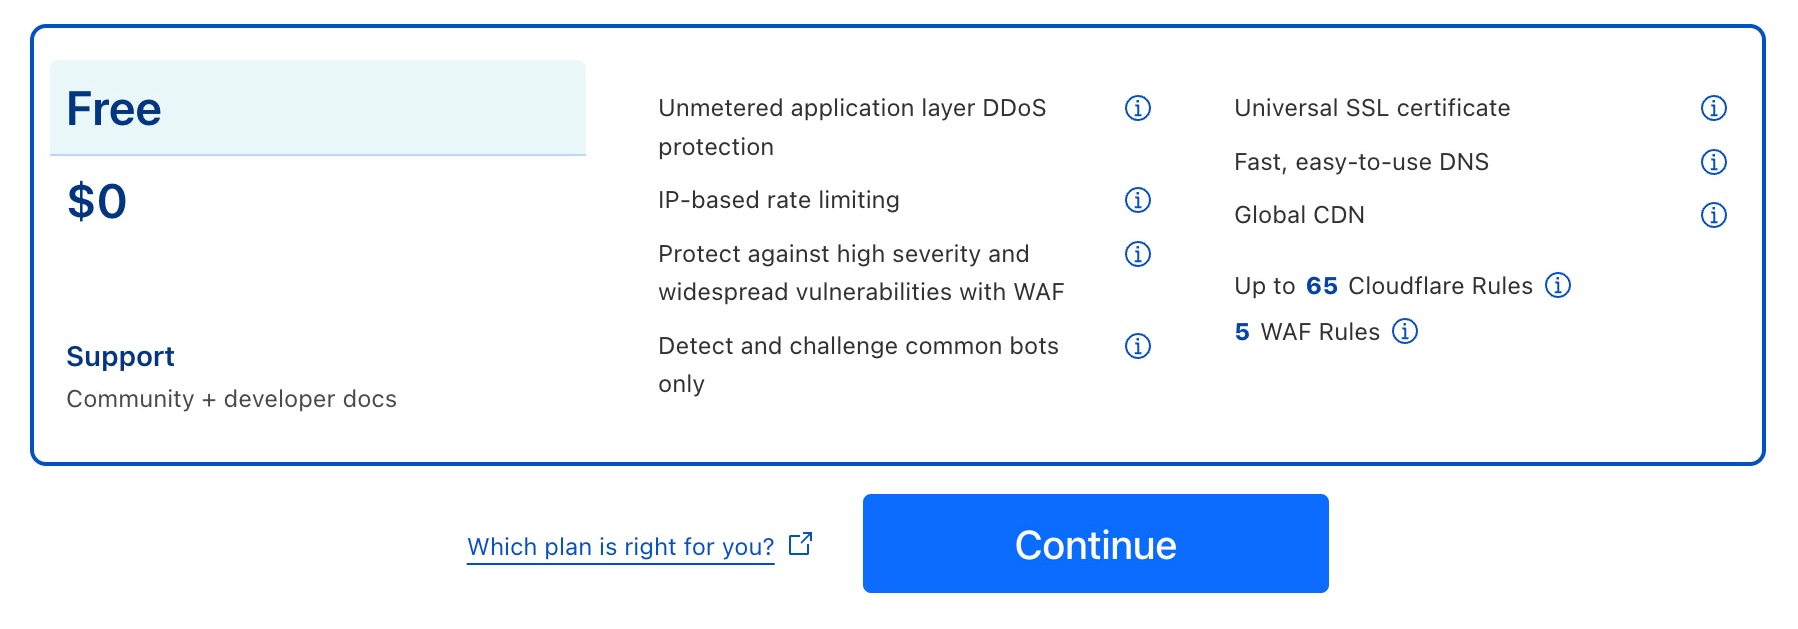
After that it will ask to choose a plan, select "Free" and "Continue".
Now you are ready to add your DNS records, click "Add record".
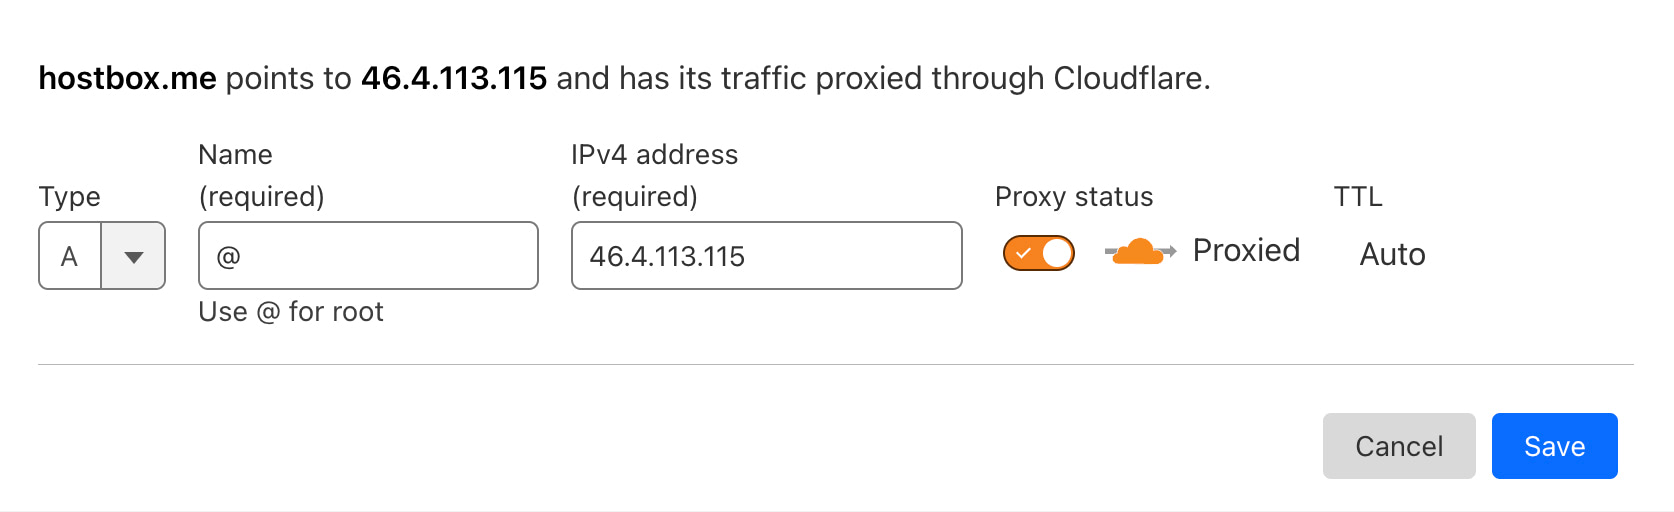
The first entry should have a name "@" which is the root of your domain and the IPv4 "46.4.113.115".
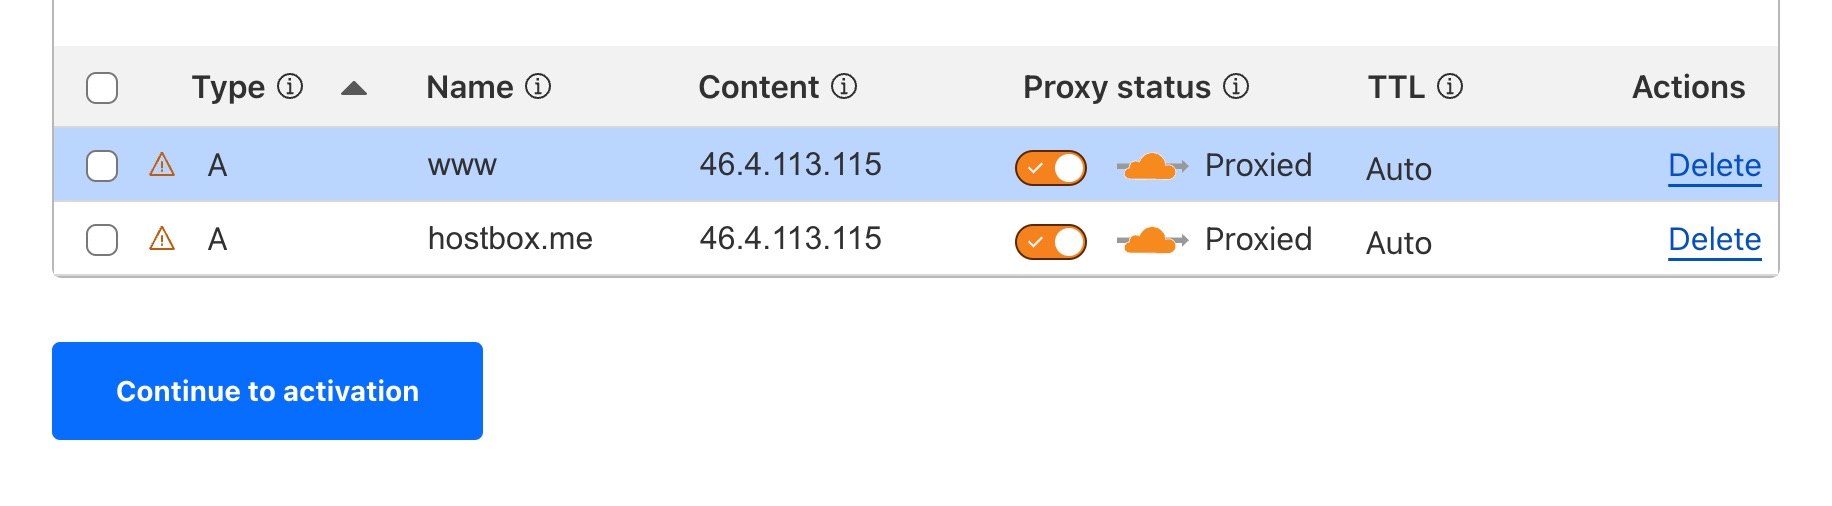
Add another DNS record with the name "www" and the same IPv4 as before "46.4.113.115".
That's all the DNS records you need, one is for your main root domain, and the other one is the alias to make your domain work with the prefix "www". The final records should look like the image below. Click "Continue to activation".
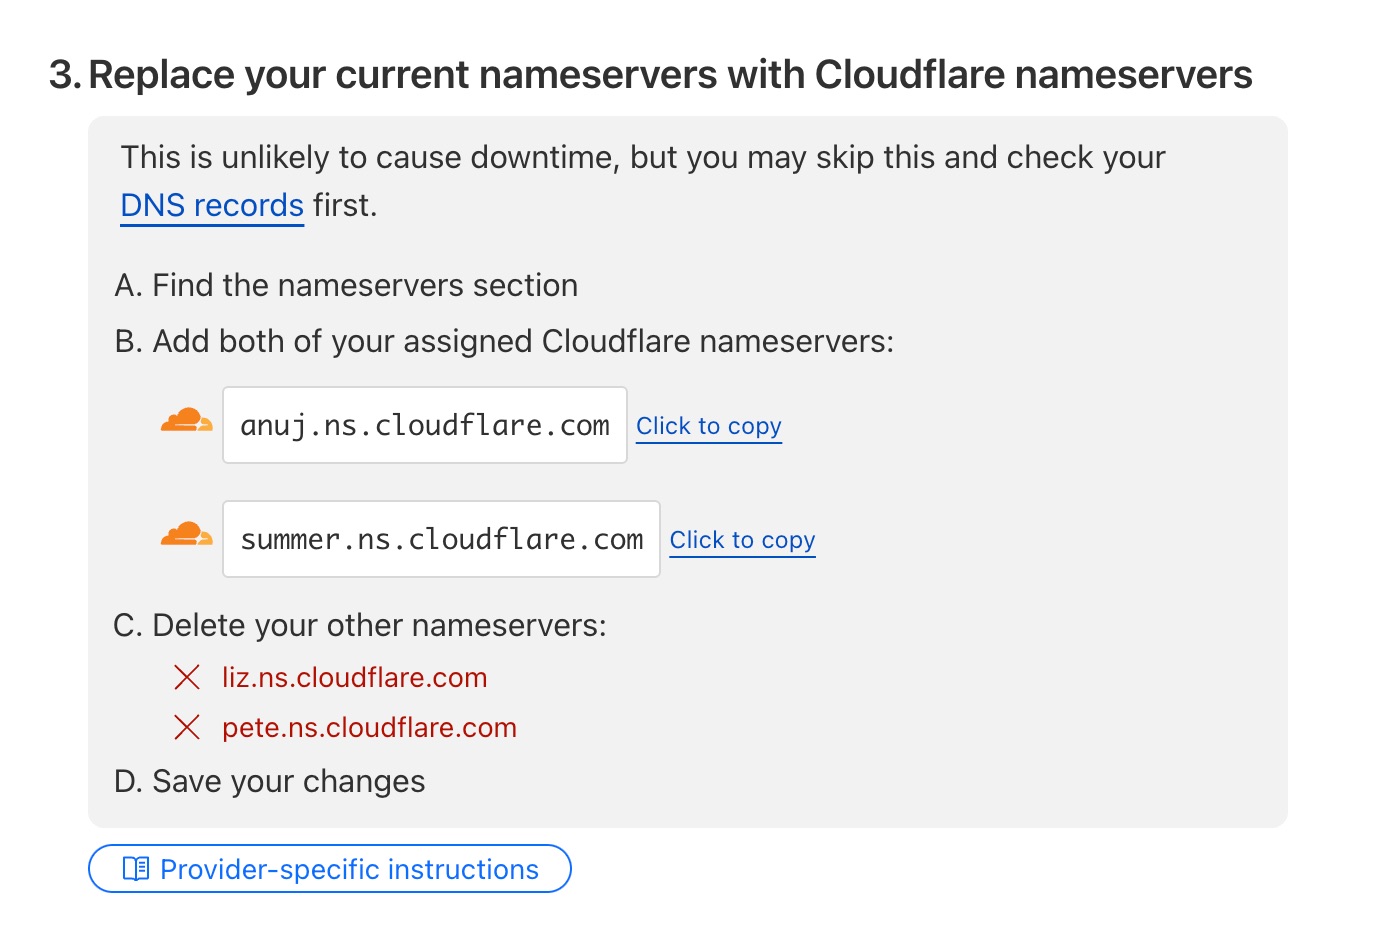
In the last step you will need to go to your domain configuration under Hostbox Services, and change your nameservers as required by Cloudflare.
That's it, now your domain is connected with Hostbox.